The Zulu War stands as one of the most important conflicts in the history of British imperialism in Africa, and it revealed both the strength of the Zulu Kingdom and the ambition of the British Empire. Fought in 1879 in what is today South Africa, the war pitted the powerful army of the Zulu people against the professional soldiers of the British Empire. The fighting produced some of the most famous battles of the entire colonial era, including the crushing British defeat at Isandlwana and the desperate defense at Rorke’s Drift. In the end, the war led to the destruction of the independent Zulu Kingdom and the spread of British control across the region.
The Zulu War, also called the Anglo-Zulu War, was a short but bloody conflict between the British Empire and the Zulu Kingdom that lasted from January to July of 1879. It grew out of Britain’s larger effort to unite the many territories of southern Africa under one government. The Zulu Kingdom, which was strong, independent, and well organized, stood in the way of that plan, and the British decided to remove it by force.
Background of the Zulu War
By the 1870s, the British Empire controlled several colonies in southern Africa, including the Cape Colony and Natal. British leaders wanted to join these colonies together with the independent Boer republics and the African kingdoms into a single confederation, or union, under British rule. The Boers were descendants of Dutch settlers who had come to South Africa in the 1600s, and they controlled their own republics in the interior. In 1877, the British annexed, or took over, the Boer territory of the Transvaal, which brought their empire right up against the border of the Zulu Kingdom.
Several reasons pushed the British toward war with the Zulus. Several factors caused the war, including the British desire for Zulu labor in diamond fields, the British plan to create a South Africa federation, and Boer land claims on Zulu territory. Diamonds had recently been discovered in South Africa, and British mine owners wanted a large supply of workers. More importantly, British officials believed that the strong Zulu army was a threat that had to be broken before their confederation plan could succeed.
At the center of the crisis was Sir Bartle Frere, the British high commissioner for South Africa. The build up to the war started in 1877 when Frere, a British colonial administrator, was sent to Cape Town with the task of uniting South Africa under a single British confederation. However, Frere soon realized that uniting the Boer republics, independent black states and British colonies could not be realized until the powerful Zulu kingdom on its borders had been defeated. To create a reason for war, Frere issued a set of demands that the Zulu king could not accept.
The Zulu Kingdom at this time was ruled by King Cetshwayo. Frere issued an impossible ultimatum to Cetshwayo, the Zulu king, demanding that the Zulu dismantle their military system. An ultimatum is a final demand backed by the threat of war. Because the Zulu army was central to the kingdom’s power and way of life, Cetshwayo could not agree to break it up, and Frere knew this when he made the demand.
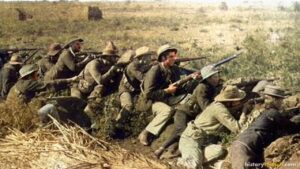
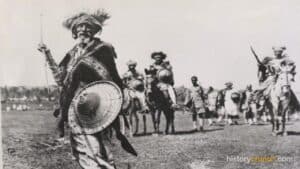
The two sides that faced each other were very different. The British brought modern rifles, cannons, and disciplined professional soldiers into the fight. Famous for the bloody battles of Isandlwana and Rorke’s Drift, the Anglo-Zulu War of 1879 saw over 15,000 British troops invade the independent nation of Zululand in present-day South Africa. The Zulu army, by contrast, was enormous and highly trained in its own way. Cetshwayo assembled an army of 40,000 to 60,000 soldiers to defend their land. These warriors fought mainly with short stabbing spears, called assegais, and large cowhide shields, and they used clever battlefield tactics that surrounded their enemies.
How the Zulu War Unfolded
When the deadline of the ultimatum passed without the Zulus agreeing, the British invaded. After the Zulu kingdom ignored the British ultimatum to fully demilitarize within 30 days, British troops invaded Zululand in three columns from the southern African republic of Natal, under the leadership of Lord Chelmsford. The plan was for the three columns to move separately into Zululand and then meet at the royal Zulu center at Ulundi. Lord Chelmsford led the main central column across the border in January of 1879.
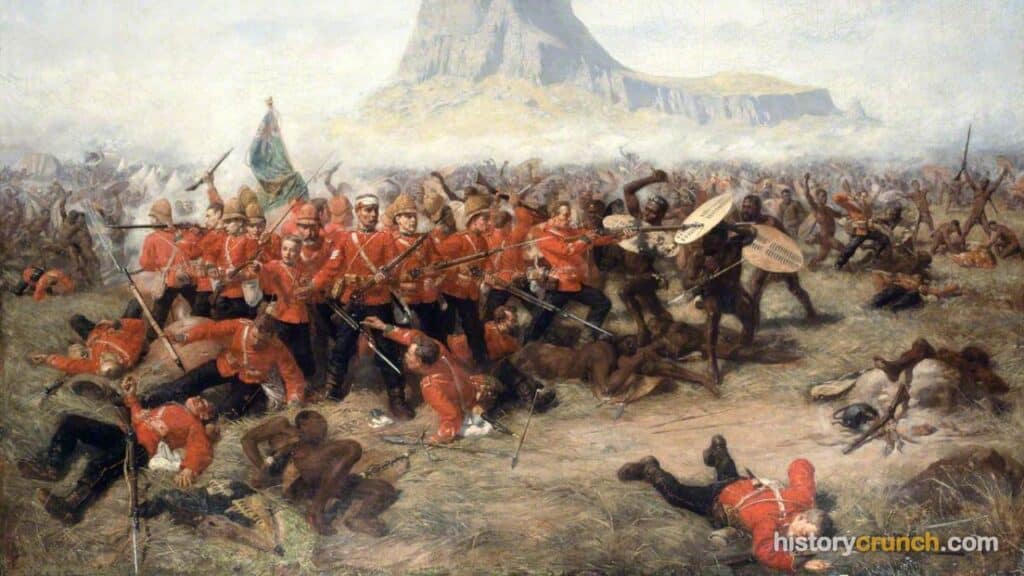
The first major battle of the war ended in disaster for the British. On January 22nd, 1879, a huge Zulu army attacked Chelmsford’s central column at a rocky hill called Isandlwana. The British camp there had not been fortified because the soldiers believed the site was safe and would not be attacked. In reality, tens of thousands of Zulu warriors were hidden nearby, and they struck while Chelmsford was away from camp with part of his force.
The result was one of the worst defeats in British colonial history. The Zulu annihilated a central British column at Isandlwana on January 22, killing 800 British soldiers. The Zulus used their famous tactic of forming the shape of a bull’s horns, with a strong center and two wings that curved around to trap the enemy. British soldiers were overwhelmed by sheer numbers before their rifles could turn back the attack.
Just hours after the victory at Isandlwana, part of the Zulu army pushed on toward a small British supply post. Immediately after their famous victory over the British at the Battle of Isandlwana on 22 January 1879, as many as 4,000 Zulu warriors pushed on across the Zulu-Natal border. This Zulu army headed for Rorke’s Drift, some 12 miles (19 km) away. Here was a mission station and 140 soldiers of the 24th Warwickshire Regiment and allied troops. The tiny garrison quickly built barricades out of wagons, mealie bags, and biscuit boxes to defend themselves.
The defense of Rorke’s Drift became one of the most celebrated events of the war. A siege battle lasted 12 hours, but the defenders held on, all the more remarkable a feat since a good number of the men were invalids even before the battle started. Eleven Victoria Cross medals were awarded for the successful defence of Rorke’s Drift. The Victoria Cross is the highest British award for bravery in battle. After the disaster at Isandlwana, the stand at Rorke’s Drift was a welcome boost to British morale. But it had little effect on the Zulu War as a whole.
News of the defeat at Isandlwana shocked the British public and forced the army to change its plans. More soldiers, weapons, and supplies were sent to South Africa, and the British prepared to invade Zululand a second time with far greater strength. The tide of the war soon began to turn in Britain’s favor. On March 29th, 1879, following the retreat at Hlobane, Colonel Wood set up a defensive camp at Kambula with his remaining force of 2,000 men, and over 20,000 Zulus were repelled there with the loss of only 18 British soldiers. The Battle of Kambula is seen as the turning point in the Anglo-Zulu War.
More British victories followed as the invasion pressed forward. On April 2, British troops heavily defeated the Zulu at Gingindlovu, killing over 1,000. These battles showed how deadly disciplined rifle and cannon fire could be against warriors armed mainly with spears when the British had time to prepare strong defensive positions. Step by step, the Zulu army was worn down and its losses grew impossible to replace.
The final blow came at the Zulu capital. On July 4th, 1879, the main Zulu force of around 15,000 men attacked Lord Chelmsford’s army at the Battle of Ulundi, the Zulus were destroyed, and this effectively marked the end of the Anglo-Zulu War. At Ulundi the British formed a large hollow square of soldiers on open ground and used their rifles and cannons to shatter the Zulu charges. With the destruction of their army and the burning of the royal center, Zulu resistance collapsed.
After the fighting ended, the British hunted down the Zulu king. On 31 August, Cetshwayo was captured and sent into exile. He was first taken to Cape Town and later brought to London, far from the kingdom he had once ruled.
Significance of Zulu War
The Zulu War marked a major turning point in the history of southern Africa. The aftermath of the war saw the disintegration of the Zulu kingdom, the capture of Cetshwayo, and the eventual annexation of Zululand by Britain in 1887. The Zulu War marked a turning point in South African history, as it not only diminished the Zulu’s power but also facilitated greater white dominance in the region. In this way the war opened the door to expanded British and European control over land that had once belonged to a strong African kingdom.
After the war, the British broke apart the Zulu Kingdom so that it could never again threaten their plans. The Zulu Kingdom was then divided into 13 rulerships. Zululand became a crown colony in 1887 and was absorbed into Natal in 1897. By splitting the kingdom into many smaller pieces, the British made sure that no single Zulu leader could rebuild the united army that had nearly defeated them.
The war also had a deep effect on how people around the world viewed both the Zulus and the British Empire. The victory at Isandlwana proved that a well-organized African army could defeat a modern European force, and it forced the British to respect the fighting skill of the Zulu people. At the same time, the defense of Rorke’s Drift became a famous symbol of courage in British culture. For the Zulus, however, the war brought loss, humiliation, and the end of their independence.
More overall, the Zulu War is remembered as a powerful example of the costs of European imperialism in Africa. It showed how far the British Empire was willing to go to expand its control, even against a people who had done little to provoke it. The bravery shown on both sides, along with the terrible loss of life, has kept the war a subject of study and memory for more than a century.
Frequently Asked Questions
When did the Zulu War take place?
The Zulu War took place in 1879 and lasted about six months, from January to July. The British invaded Zululand in January of 1879, and the fighting ended after the Battle of Ulundi in July. Although it was a short war, it included several major battles that are still famous today.
Who won the Battle of Isandlwana?
The Zulus won the Battle of Isandlwana in a stunning victory over the British. It was the first major battle of the war and one of the worst defeats the British Empire suffered in Africa. The Zulu warriors used their bull’s horn formation to surround and overwhelm a British camp that had not been fortified for defense.
Why is Rorke’s Drift so famous?
Rorke’s Drift is famous because a very small British garrison held off thousands of Zulu warriors during a long night of fighting. The defense earned eleven Victoria Cross medals, the highest number ever given for a single battle. It became a celebrated story of courage that helped lift British spirits after the defeat at Isandlwana.
What weapons did the Zulu army use?
The Zulu army mainly used short stabbing spears called assegais, along with large cowhide shields and wooden clubs. Some warriors also carried older firearms, but they were not as effective as the modern rifles carried by the British. The real strength of the Zulu army came from its discipline, huge numbers, and clever surrounding tactics.
What happened to King Cetshwayo after the war?
King Cetshwayo was captured by the British in August of 1879 and sent into exile far from his kingdom. He was taken first to Cape Town and later to London, where he even met with British leaders. The British then divided his former kingdom into thirteen smaller parts so that it could never again unite as a single power.
Cite This Article
To cite this article as a source, use one of the formats below.
MLA: Millar, B. “Zulu War: A Detailed Summary.” HistoryCrunch, 14 August 2026, https://historycrunch.com/zulu-war/.
APA: Millar, B. (2026). Zulu War: A Detailed Summary. HistoryCrunch. https://historycrunch.com/zulu-war/
Chicago: Millar, B. “Zulu War: A Detailed Summary.” HistoryCrunch. August 14, 2026. https://historycrunch.com/zulu-war/
Sources
- J.M. Roberts & Odd Arne Westad, The Penguin History of the World.
- Jerry Bentley & Herbert Ziegler, Traditions & Encounters: A Global Perspective on the Past.